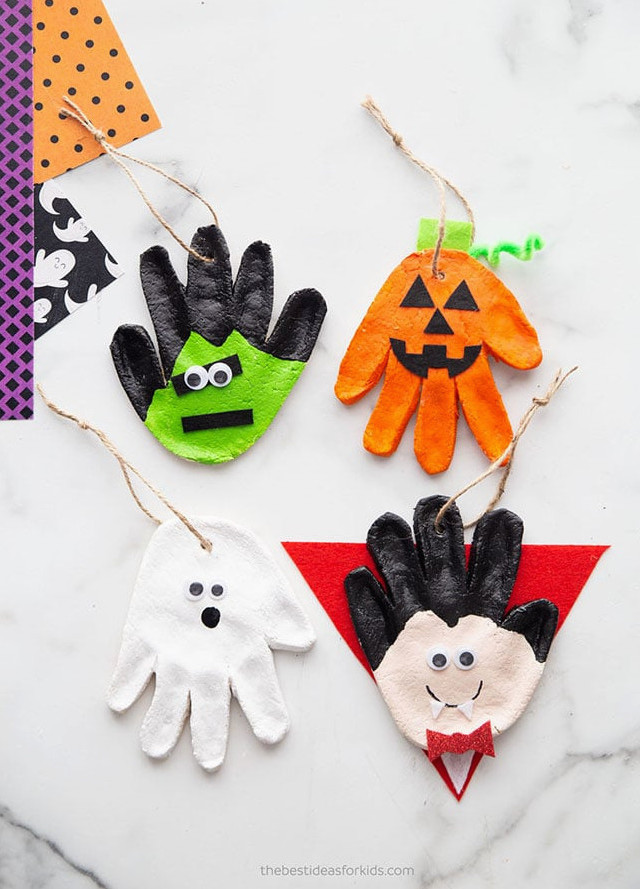
We created these ornaments to match our Halloween handprint cards. Use the same Halloween characters to make an opening handprint card, or turn them into sweet seasonal ornaments. We had so much fun making the cards that we thought the designs would be just as adorable hanging up!
You only need a few simple ingredients, many of which are probably already in your kitchen. Kids can also join in by helping stir together and knead the dough.
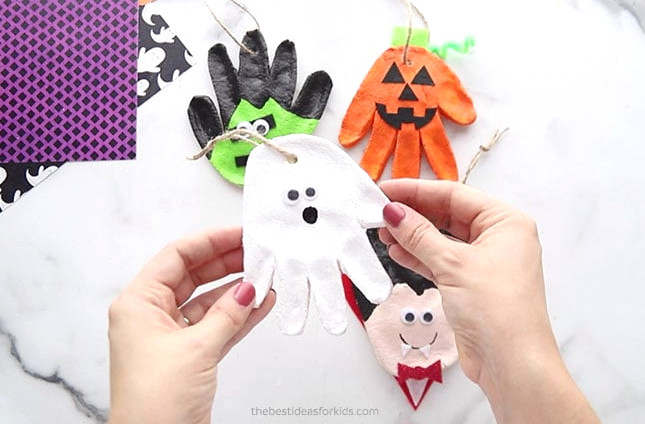
Required Supplies
For Preparing the Salt Dough:
- Flour
- Salt
- Warm Water
- Straw (for making the hanging hole)
- Twine (for hanging)
- Sealer – protect the finished ornaments with either mod podge or a clear glaze spray. For the most durable result, we prefer this spray . An adult should apply the spray while carefully following the directions on the chosen product. Sealing the ornaments may help reduce cracking after several years.
For the salt dough recipe – see the recipe provided below.
REMINDER and SAFETY NOTE: Please keep these away from pets, as they may be toxic to dogs if swallowed.
These are the supplies needed for decorating:
How should I seal the ornaments?
Once the ornaments are complete, coat them with either mod podge or a clear glaze spray. It is easier to seal them before adding decorations such as felt and googly eyes. This spray leaves a long-lasting protective coating. Spraying should always be done by an adult according to the product instructions. A sealed ornament is less likely to crack over time and receives added protection against mold.
Which Glue Should I Choose?
Hot glue works especially well for securing decorations to salt dough. It creates a firm bond, helping the ornaments remain intact for longer. Young children should ask an adult to handle this part of the project.
Salt Dough-Making Tips
- I like to let the salt dough dry naturally for 24 hours before baking. This can shorten the time it needs in the oven.
- When the ornaments come out of the oven, inspect their undersides. If they still feel a little soft, set them on a cookie-cooling rack or flip them over and allow them to air-dry for one more day so the bottoms receive adequate airflow.
- Use a low oven temperature. The process will take longer, but gentle baking helps keep the salt dough from swelling.
- Achieving smooth salt dough requires plenty of kneading. I generally knead it for at least 10 minutes. Before kneading and rolling, separate the dough into smaller pieces.
- When the dough feels dry at first, continued kneading will often improve the texture. If needed, add a little water, but do so slowly to avoid making the dough too wet.
- Combine 4 cups of all-purpose flour with 1 cup of salt in a bowl.
- Add 1.5 cups of warm water and stir until the ingredients come together into a dough.
- If the dough appears a little dry, gradually add more water, one tablespoon at a time. For a dough that feels too sticky, work in a small amount of flour.
- Knead the mixture until it forms a soft, smooth ball, working it for at least 10 minutes to develop the right consistency. Roll the dough to slightly less than 1/2 inch thick. It should have a smooth finish; if it does not, knead it for a few additional minutes.
- Press your hand firmly into the dough to leave a handprint.
- An adult should carefully cut around the handprint with a knife. Leave a little extra dough around each finger to prevent the pieces from becoming too delicate in the oven. If you are creating the full ornament collection, repeat these steps 3 more times.
- Make a hanging hole with a straw at the top of the middle finger for Frankenstein and the Vampire. For the ghost and pumpkin, position the hole on the other side, where the fingers point downward.
-
If you have time, let the ornaments air-dry for one day before baking. This helps shorten the time they need in the oven. Bake at 250 degrees Fahrenheit (or 120 degrees Celsius) for 2 hours. Then transfer the ornament bases to a cookie cooling rack and leave them to air-dry for one day before painting.
- Paint the ornaments and allow them to dry completely. Before adding the decorations, seal them with clear spray sealer or Mod Podge.
- Decorate each ornament according to the ideas listed below.
- Tie on a piece of twine or ribbon for hanging.
Halloween Salt Dough Craft Decorating Ideas
Paint the handprints first:
- Paint the pumpkin handprint orange
- Use white paint for the ghost
- Color Frankenstein green. After the green layer dries, paint the fingers black to form the hair.
- Paint the vampire’s face beige (or this shade). Once it has dried, paint the fingers black to represent the hair.
Frankenstein
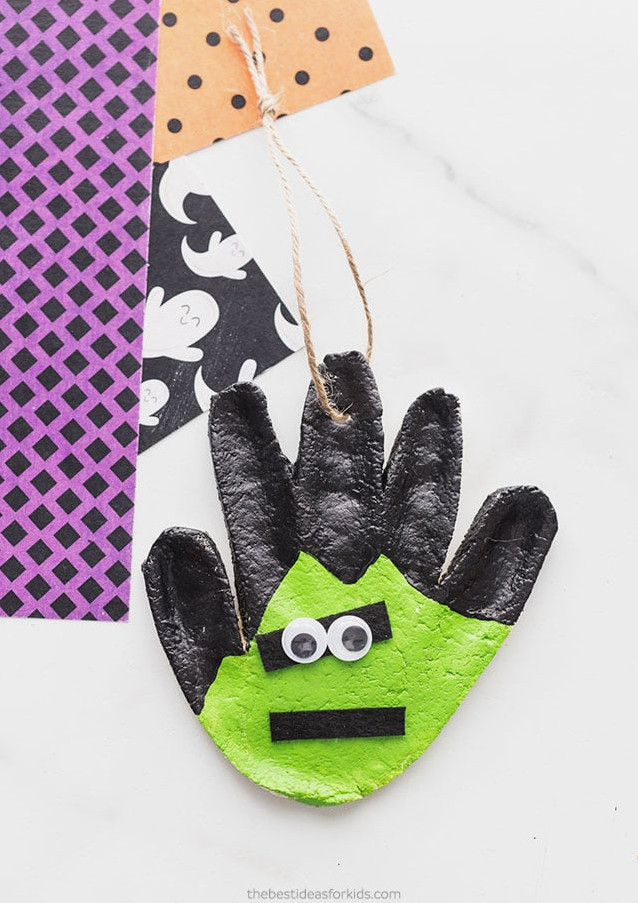
1. Cut two rectangular pieces from felt and glue them onto the face to make the eyebrows and mouth.
2. Glue 2 googly eyes above the felt eyebrow piece.
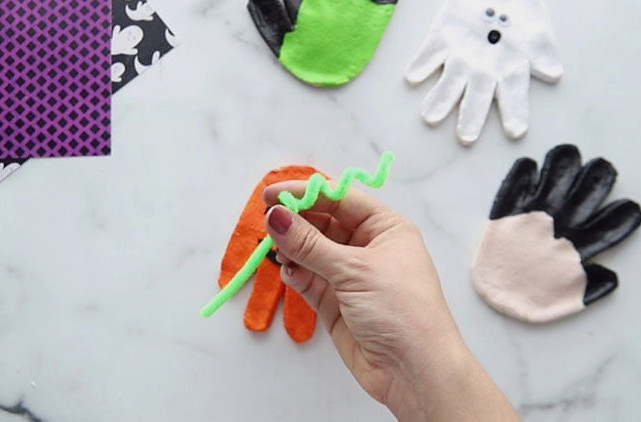
Pumpkin
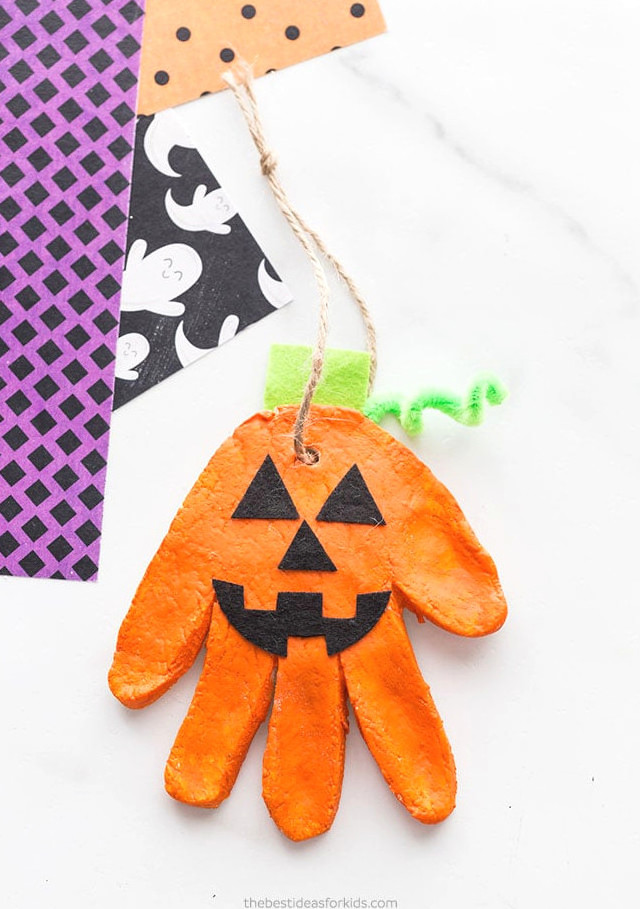
1. Cut the eyes, nose, and mouth from black felt, then secure them with glue.
2. Create a stem from green or brown felt and glue it to the back of the handprint near the top.
3. Coil a green pipe cleaner around a pencil, then attach it to the upper back of the handprint.
Ghost
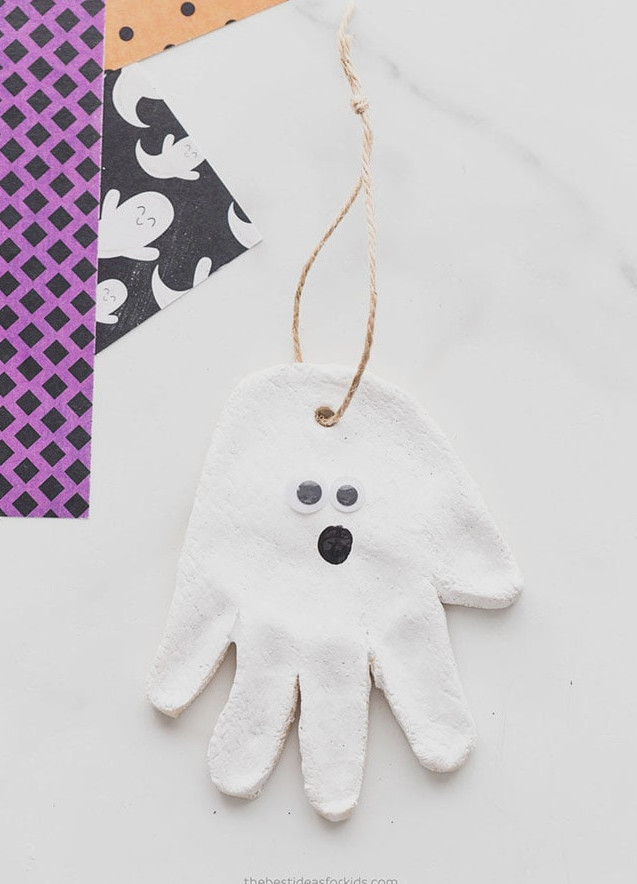
1. Glue on 2 googly eyes, using one that is slightly larger than the other for a playful look.
2. Draw the mouth with black paint or a black Sharpie.
Vampire
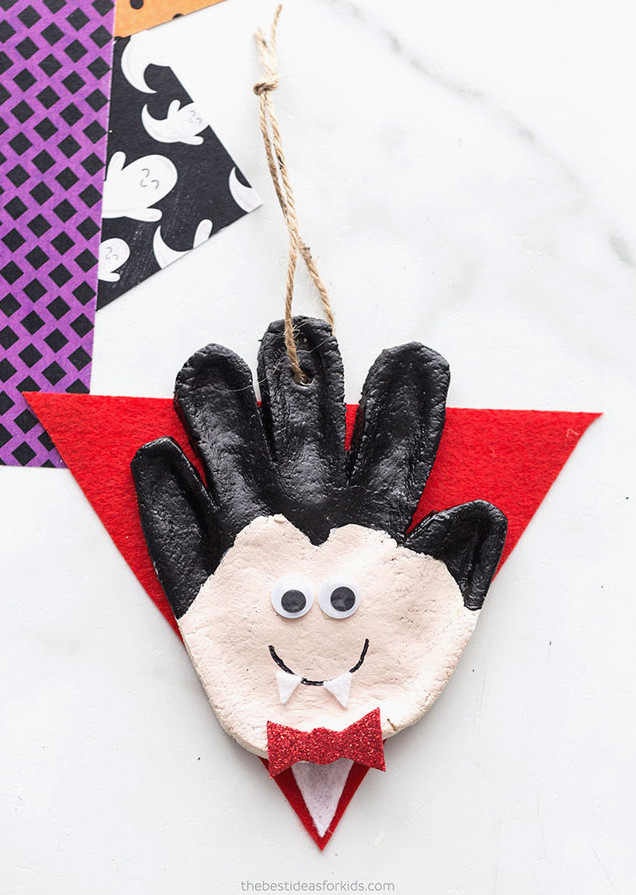
1. Cut a triangle from red felt and glue it to the back of the handprint.
2. Cut a narrow white felt triangle and attach it along the bottom edge of the red triangle.
3. Glue 2 googly eyes onto the face.
4. Draw on the mouth with a black Sharpie.
5. Cut 2 small white felt triangles and glue them inside the mouth.
6. Cut a bow from glitter foam paper and attach it to the lower portion of the handprint.
Have fun making these adorable Halloween handprint ornaments!